PURPOSE: This chapter describes the commands included in Express that allow you to maintain the various objects in a Database Library.
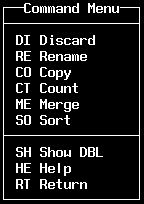
Select LIBRARY (the default option) from the Master menu and press <RETURN>. Select COMMANDS from the Library menu to invoke the Command menu (Figure 50).

There are nine options in the Command menu:
|
DISCARD |
remove DBL objects |
|
RENAME |
change the name of a DBL object |
|
COPY |
duplicate a DBL object |
|
COUNT |
total the number of records in a DS |
|
MERGE |
combine data from two different DSs |
|
SORT |
arrange order of data |
|
SHOW |
list contents of DBL objects |
|
HELP |
display help information |
|
RETURN |
go back to the Library menu |
To see how many records are in a DS, select COUNT and press <RETURN>. Express will prompt for a DS name. You can get a list of DSs by entering a slash and pressing <RETURN>. The Select Data Set window appears (Figure 51). This select window is the same for SDs and DIs under other command functions.
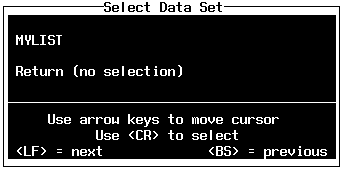
Figure 51 Select Data Set Window
For the example, enter MYLIST and press <RETURN>. The DS name is displayed below the right half of the Master menu.
Next, Express asks you if you want to qualify records for counting. If <RETURN> is pressed with YES (the default) selected, Express will display a field selection window (Figure 52) for specifying criteria.
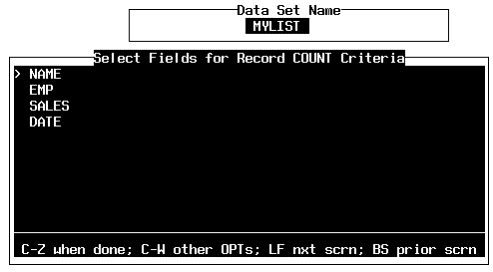
Fields can be selected to specify conditions for records to be counted. This selection window looks and operates the same as field selection windows previously shown. Pressing <CTRL> Z after a field is selected will invoke the criteria selection window (Figure 53). This window looks and operates the same as previously shown for criteria selection.

Figure 53 Select Criteria Window
After the criteria selection window is exited, a Count Criteria menu (Figure 54) common to sort and count functions appears with five options.

|
PROCEED |
execute the function (count, sort) |
|
REVIEW |
display listing (criteria, sort) |
|
CANCEL |
return to criteria selection window |
|
RETURN |
return to Command menu (Express confirms discontinuing function) |
|
EXIT |
end Express session |
After a field is chosen, a criteria is selected, and the count is started, Express will display a message of how many records are qualified or unqualified (Figure 55).
![]()
Figure 55 Count Processing Message
For the example, select 'NO' so all records are treated as qualified. Press <RETURN> to execute the count. Express will display the same processing message of how many records are qualified or unqualified.
To sort an SD, select SORT and press <RETURN>. Express will prompt for a DS name. For the example, enter MYLIST and press <RETURN>.
Express displays the selected (current) DS name and prompts for a destination DS for the sort. An existing DS must be specified or Express will display an error message. You may enter the same DS name, but Express will warn you that the current DS will be over written. The default is YES to continue or NO to abort the action.
For the example, enter MYLIST as the destination DS and press <RETURN>. Accept the default YES on the warning prompt by pressing <RETURN>. Express will display a field selection window (Figure 56) for specifying sort order. The order in which the fields are selected determine their sort level.
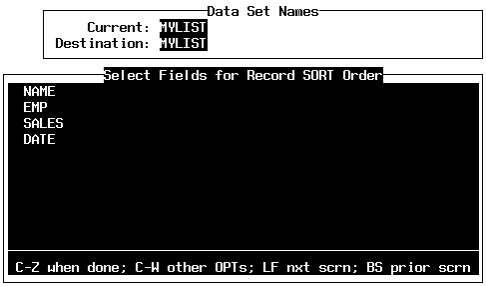
Figure 56 Sort Field Selection Window
For the example, move the cursor to NAME and press <RETURN> to select. Press <CTRL> Z to invoke the sort select window (Figure 57).
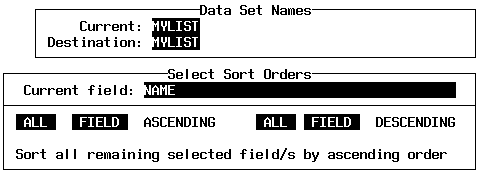
Figure 57 Select Sort Orders Window
The fields appear in the sort select window in the order they were selected. You can sort the displayed file (or all remaining selected fields) in ascending or descending order. If ALL is selected for either sort type, the remaining fields will not be displayed. For the example, select ALL for ascending sort.
Once the last field is processed, the Sort Order menu is displayed. This menu is similar to the one in the count function. To list the selected fields for sorting, select REVIEW and press <RETURN>. The fields are
listed in the order of selection with a dash (-) in front of descending sort field. Select RETURN and press <RETURN> to go back to the Sort Order menu.
For the example, select PROCEED and press <RETURN>. Control is returned to the Command menu without any other messages being displayed.
To change the name of a DBL object, select RENAME and press <RETURN>. Express displays the Rename menu (Figure 58).
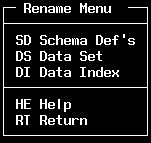
The Rename menu has five options:
|
SCHEMA DEF |
rename an SD |
|
DATA SET |
rename a DS |
|
DATA INDEX |
rename a DI |
|
HELP |
display help information |
|
RETURN |
return to the Command menu |
For the example, select DATA SET and press <RETURN>. Express will prompt for the old DS name and the new DS name (Figure 59).
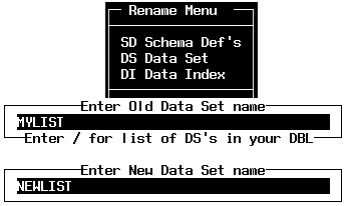
For the example, enter MYLIST for the old name and press <RETURN>. Enter NEWLIST for the new DS name and press <RETURN>. Control is returned to the Rename menu. Select RETURN and press <RETURN> to go back to the Command menu.
To make a copy of a DBL object, select COPY and press <RETURN>. Express displays the Copy menu (Figure 60).
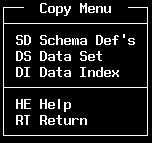
The Copy menu has five options:
|
SCHEMA DEF |
copy an SD |
|
DATA SET |
copy a DS |
|
DATA INDEX |
copy a DI |
|
HELP |
display help information |
|
RETURN |
return to the Command menu |
For the example, select DATA SET and press <RETURN>. Express will prompt for the source DS name and the destination DS name (Figure 61).

For the example, enter NEWLIST for the old name and press <RETURN>. Enter NEWLIST2 for the new DS name and press <RETURN>. Control is returned to the Copy menu. Select RETURN and press <RETURN> to go back to the Command menu.
To merge two DSs, select MERGE and press <RETURN>. Express will prompt for the master DS. An existing DS name must be entered. For the example, type NEWLIST and press <RETURN>.
Next, Express prompts for a transaction DS. An existing DS name must be entered. Re-entering the master DS name is not acceptable. For the example, type NEWLIST2 and press <RETURN>.
Express then prompts for an output DS. An existing DS name must be entered. If the master or transaction name is re-entered, Express will warn that the given DS Will be overwritten. For the example, enter NEWLIST2 and press <RETURN>. Express will display a field selection window (Figure 62).
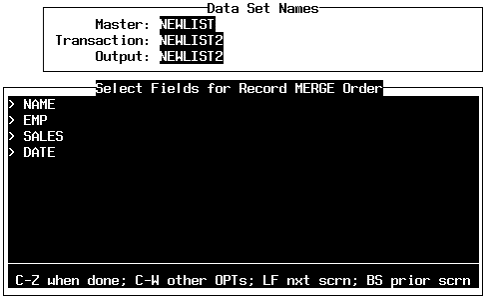
Figure 62 Merge Field Selection
For the example, select all the fields by highlighting each with the cursor and pressing <RETURN>. Press <CTRL> Z to exit the window. Express will do the processing and return to the Merge menu. Select RETURN and press <RETURN> to go back to the Command menu.
If you count DS NEWLIST2 you'll see that the number of records has now doubled
To delete DBL objects, select DISCARD (the default option already highlighted) and press <RETURN>. Express displays the Discard menu (Figure 63).

Relationships exist between the DBL objects which affects how discarding is done. SD is associated to one or more DS. A DS may have an associated DI. Discard DBL objects in the following order:
Data Indexes associated with any Data Set you wish to discard.
Data Sets associated with any Schema Definition that you wish to discard.
Schema Definitions
For the example, select DATA SET and press <RETURN>. Express prompts (Figure 64) for a DS name.
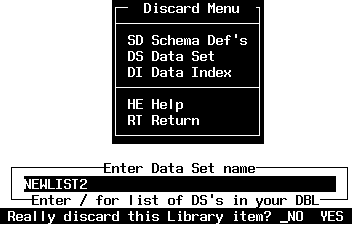
For the example, enter NEWLIST2 and press <RETURN>. Express will confirm the deletion. The default is NO. Select YES and press <RETURN>. Express does the processing and returns to the Discard menu. Select RETURN and press <RETURN> to go back to the Command menu.